

Select the Add a new record ![]() button
button
Select branch, department and record type from the ![]() buttons next to each option.
buttons next to each option.
Non edit fields are grayed out, these are setup in the index definitions.
Input a filing method e.g. monthly, alphabetically etc (not required)
Place the cursor in the file number insert box and use the hand held scanner or type in the barcode number, Ensure the barcode is correct as editing of barcode after posting is not permitted and field will be grayed out, when auto generate barcode is in use this option is grayed out, as the system will allocate a number on post of data.
If an existing record requires change to be made input number select the ![]() button.
button.
The retention definition or matrix which has been defined for the record type is displayed, this can be modified based on the document by input of the required retention period in months, selecting a destruction date using the calendar button or checking the never destroy button.
Where retention period has been defined as Date of Insert or Captured Field (which must be a true date field) once the data has been inserted the record must be saved before the ![]() button is used to calculate the destruction date.
button is used to calculate the destruction date.
If the never destroy option is checked no destruction date is calculated when the ![]() button is used.
button is used.
Insert meta data,where lookups have been defined the system will auto complete the captured data where a match is made or use look up tables (Quick selection listing) user the alt + down arrow and the list will be displayed, use arrow keys to move to the required data and press enter, this data will then be input in to the field without requirement to capture.
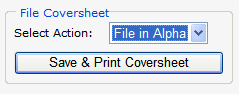
Select the ![]() or Select coversheet action followed by the
or Select coversheet action followed by the![]() button.
button.
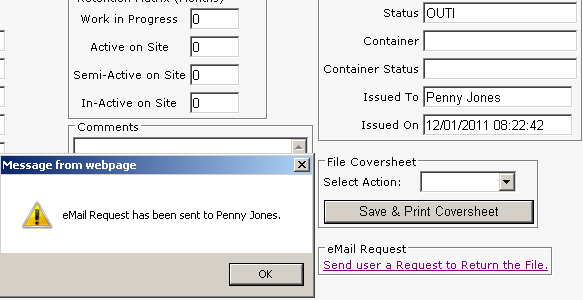
File Details displays the current location (grant system access - location viewing else not visible) and status of the record, this information cannot be edited.
The record information as captured can be printed if required by selecting the File CoverSheet action followed by the Save & Print File Coversheet button.
Where file is currently out of filing area user can be requested by email to return file, where user has defined email address.
Select the add new record ![]() button or
button or ![]() button to return to search module.
button to return to search module.
Select the 'Item Capture' tab to capture items against the file.